Showing posts with label recipes. Show all posts

On time management & eating healthy

Eating healthy has never been one of my strong suits. Hell, for that matter you can go ahead and add exercise to the list of behaviors that I do not heavily frequent.

Since I was a kid I've always just been a very particular eater. I have cravings that I almost always follow and to that fact; if I'm not hungry....I just don't eat. But let's be honest. Usually I'm hungry for salty, sweet or a combo of the two. Since becoming an adult (whatever that is) I now have broadened my food horizons and actually like veggies so much my inner child probably wants to scream daily in protest. I now heavily indulge in asparagus, brussel sprouts, artichokes, edamame, arugula and heaps of avocados.

However I'm not the best at working those tasty greens into my life when things get hectic or when a long day turns to tired. Instead I easily opt for the pizza, pasta or anything fast. And my biggest challenge.... the dreaded morning. I am not a morning folk. If it weren't for the coffee I'd probably never wake.

So awhile back I decided to make some lifestyle changes and become a Beachbody coach. I thought that if I had enough motivation (read, expensive monthly dues); I'd definitely follow through. It's never worked with the gym so I don't know why I thought it would help now. I lasted about two months before I quit but the one part I desperately enjoyed were the morning shakes with protein/vitamin powder. It was quick, easy and tasted fabulous. Not to mention; full ALL morning long. And on the especially hot Los Angeles days it was so great to mix my coffee with a few ice cubes, the vanilla powder, a frozen banana, almond milk and holy yum be out the door.


Well unfortunately that powder was not cheap and I gave it up. Until..... Naturade gave me the opportunity to try their fabulous nutritional shake. Their shakes come in great flavors with everything you need in just one serving. Vitamins, fruits, veggies, fiber, probiotics AND Vegan; which meant I didn't have to worry about my lactose-intolerance. Plus the cost is so great at just under $35 for a 22.75oz container.

www.naturade.com/product/naturade-vegansmart-vanilla-22-75-oz/


I really loved the vanilla and used it to make my own shake I like to call "Strawberry Cheesecake". Feel free to grab the recipe and try Naturade yourself. They also sell single serving size packets which are great for on-the-go or taking camping and such. Or you can learn more about Naturade on their site.


Strawberry Cheesecake Shake

1/2 cup ice
1/2 cup frozen strawberries
1/2 cup almond milk
1/4 cup graham crackers 
1tsp honey
1/2 tsp vanilla extract
1 scoop vanilla Naturade 

Add all ingredients and blend until well combined. If too thick---add more liquid. Too runny---add more ice or frozen fruit. 


*Naturade provided this product free for my review and I was not compensated in any other way. This is a sponsored post from 4sponsor.com with my unbaised thoughts. All opinions are always my own and I only share what I think my readers would also benefit from. 
 
If you want more seriously beautiful posts be sure to follow along with:
 Follow on Bloglovin

Raspberry Lemon Cream Cheese Cupcakes

Every year it seems I lose a little bit of that excitement that comes along with a birthday. I used to be the biggest, brightest most in-yo-face girl about my birthday but as I continue to move closer to the big 3-0 there's just something that lingers over me saying, "you'd better get this life going girl". And oh how I wish I could answer back, "I'm really trying... but how. Like, seriously... I'll take any answers on what's supposed to happen next". But that's for another post.

This year to try and bring a little of the fun back to the birthday; I thought there was nothing better than a cupcake.


A simple little fluffy nugget of sweet joy with a simple frosting and a tart red plump raspberry on top.


So here's to 2014 and 28 years young on Saturday. If anyone's listening my wish this year would definitely be something shiny for my left hand. You know, if candles have a real say in these things.


--//--

Raspberry Lemon Cream Cheese Cupcakes from Pastry Affair

Yields about 18 cupcakes

Raspberry Lemon Cupcakes
3/4 cup (169 grams) granulated sugar
Zest of 1 lemon
1/4 cup (1/2 stick or 57 grams) unsalted butter, room temperature
2 large eggs
1/3 cup (76 grams) sour cream (or plain, non-fat yogurt)
1/4 cup (59 ml) vegetable oil
1 tablespoon vanilla extract
1 3/4 cups (175 grams) cake flour
1 1/2 teaspoons baking powder
1/2 teaspoon baking soda
1/2 teaspoon salt
Juice from 1/2 lemon
2/3 cup milk
1 1/2 cups (9 ounces or 255 grams) fresh raspberries
Preheat oven to 350 degrees F (180 degrees C). Line a cupcake pan with baking cups.
In a large mixing bowl, mix together the sugar and lemon zest with your fingers until fragrant (about 1-2 minutes). Add the butter and beat until light and fluffy. Add the eggs one at a time, beating well after each addition. Beat in the sour cream, vegetable oil, and vanilla extract. Gradually add in the cake flour, baking powder, baking soda, and salt. Mix in the milk and lemon juice, stirring until batter is uniform and smooth. Gently stir in the raspberries.
Fill baking cups about 2/3 full and bake for 16-18 minutes, or until a toothpick inserted into the center comes out clean. Remove from the oven, transfer cupcakes to a cooling rack, and allow to cool to room temperature before frosting.

Cream Cheese Frosting
8 ounces (227 grams) cream cheese, room temperature
1/4 cup (1/2 stick or 57 grams) unsalted butter, room temperature
1 teaspoon vanilla extract
3/4 teaspoon salt
4 cups (500 grams) powdered sugar
In a large mixing bowl, beat together the cream cheese and butter until smooth. Beat in the salt and vanilla. Gradually beat in the powdered sugar. If frosting is too soft, add more powdered sugar until it reaches a spreadable consistency. Likewise, if the frosting is too stiff, add milk until it reaches a spreadable consistency.
Before serving, pipe or spread frosting on top of cooled cupcakes and decorate with a few fresh raspberries, if desired. If cupcakes will sit out more than a day, keep refrigerated in an airtight container to help preserve them. Serve at room temperature.


If you want more seriously beautiful posts be sure to follow along with:
 Follow on Bloglovin

Easy Refrigerator Pickling

I have a love of mason jars as well as a love of all things pickled. This combo has lead me to a natural desire to want to pickle my own veggies. Well, that and the fact that we get a Farm Fresh box delivered to our house monthly and I'm always looking for way to use all of our scrumptious items before they go bad. 

But I don't do complicated.

So here's an easy recipe for those of you that can't deal with the long complicated process of normal canning. (*Note: I am not a trained chef and this is just a method that's worked for me. I in no way vouch that it is the best method. Please use at your own risk/desire.)


**Before chopping get a saucepan on the stovetop (over medium heat) and add the following and stir:
  • 2 1/2 C white vinegar
  • 3 C water
  • 1/4 C salt
  • 3 T sugar
 Heat until boiling.


Step One. Chop.

Gather whatever type of veggies you'd like to use and chop them all up into sizes that should fit your mason jars. I have two larger jars I used for this project so I washed and then chopped the ends off all my green beans and did the same for my Persian cucumbers. Then I chopped them into long spears. Also use fresh garlic and chop it into large pieces. I cut each clove into four pieces.

 
 Step Two. Spice.

Add the following spices to your jars as well as the garlic.
  • 2 t dill seeds
  • 2 t caraway seeds
  • 4-6 bay leaves

The amounts in each jar aren't too important. Or you can also cheat and just buy an all-in-one pickling spice. It works great and saves money. I used McCormick's Pickling Spice. You can also get crazy and add peppers or other spicy additions if you like it hotter but I wanted to keep this batch on the mild side.


Step Three. Fill.

Put those veggies in! Squeeze them, shove them.... do what you gotta do. 

Now pour the boiling mixture carefully into the jars. If there's extra space you can just fill it with additional boiling water. Carefully (using an oven mitt) put the lids on the jars. If you have time... let them cool before capping. They will not have an airtight seal but that's ok because you'll be eating them before you know it!


Refrigerate and you'll be able to enjoy in about two weeks!

Let me know if you've tried this recipe or you have any tasty additions or combinations!


If you want more seriously beautiful posts be sure to follow along with:
Follow on Bloglovin

Brussels love.

Let me introduce you.

Brussels, meet my friends.

Friends, meet your new obsession, brussels.


No, seriously.

I know what you're thinking.
These are like the grossest thing since broccoli. 

But you grew up and realized that was good.
Trust me, brussels are too.

I wouldn't lie to you.

Just hear me out.


>>BRUSSELS RECIPE

-Brussels (however many suit your needs)
-Butter
-Garlic

>>STEP ONE


Cut you brussels in half and put a pan on the stove.
Add a drizzle of olive oil and turn on medium heat.


>>STEP TWO


Place flat side down in pan.
Add water to cover bottom of pan.
Cover with lid and allow to steam.
About 10 minutes. Until color brightens.


>>STEP THREE


Once water dissolves add few tablespoons of butter.
Add garlic. I use about 3-4 frozen cubes from TJs.
(about 2-4 cloves, any way you like it)
Let cook until bottoms brown slightly, tossing occasionally.
Time varies. About 10-15 mins. 

>>STEP FOUR


Serve and enjoy.
Seriously.

These babies are slightly soft, moist and have just a touch of crisp crunch when you bite into them.
Plus best of all they taste like garlic and butter.
See, told ya it wouldn't be bad.
I didn't say it'd be healthy either.

Let me know if you try them.
I literally eat them 3 times a week.

Happy day friend.

Watermelon Margarita


Recently I have been obsessed with watermelon. I've been eating it by the bowl full (and peeing more than ever, TMI?).

Anyway,  I remembered this restaurant I used to work at that made a fabulous watermelon margarita and since margaritas pretty much scream summer to me (and it's darn hot here in LA) thus came my version of this tasty drink.


*Recipe written for one drink, but you could add more if making for multiples.

INGREDIENTS:
-frozen watermelon (about 2 cups)
-Skinnygirl margarita (or just any margarita mix, also yummy is fresh squeezed lemon/lime but I'm not into all that work in the summer)
-extra tequila (if you like)
-salt
-lime, lemon or orange

DIRECTIONS:

{Pre-Prep} First you'll need to chop up your watermelon into small pieces. Please be careful as these delicious beasts are quite awkward to chop. Once chopped scatter onto a non-stick cookie sheet (or lightly spray sheet first) and put in the freezer. {**this step is important so that the pieces freeze separately instead of as one huge clump} Transfer to a storage container once frozen to keep in freezer for future uses. 

1. Place about 2 cups of frozen watermelon in blender (more or less depending on how many people ate indulging).

2. Add Skinnygirl margarita (or your choice of sweet and sour type mix) until the liquid just almost covers all the watermelon.

3. Add tequila (if you weren't using the Skinnygirl OR if you want a little more kick).

4. Blend on high.

5. Use lime (lemon or orange good too) to coat the edge of your glass and dip in cocktail salt.

6. Pour delicious margarita into your fav glass (mine is mason) and ENJOY!

Dump Cake. {the easiest dessert you'll ever make}

So we all have recipes that we learned from our parents. And there are a few that one day I will show you that are super delicious but somewhat time consuming. This is not that. This recipe is the EASIEST recipe you'll probably ever make. Well, don't challenge me on that but it really is. It has three ingredients. Did you see that? Just THREE. And I'm not promising that it's a healthy recipe {because honestly, this is not that kind of blog} but I AM promising that it is fantastically delicious. Oh, and did I mention easy?

This is what my mom calls "Dump Cake".
Why?

Because you literally dump cake mix into the pan.

You'll see.
Keep reading.


Ingredients


-any boxed white cake mix
-can of fruit (choose your favorite, I like peaches) with the juice
-butter

Directions 

1. Preheat the oven according to the directions on the cake mix.
2. Grease a 13x9 glass pan.
3. Open canned fruit and dump into the pan. (I also added chopped strawberries, but it's totally up to you what fruit you use.)
4. Open dry cake mix and dump into the pan on top of the fruit.
5. Drop about 8-10 teaspoons of butter over the cake mix throughout the pan.
6. Bake according to the timing on the box or until lightly golden brown and bubbly.


**I didn't remember to take pictures at all (dang) but I will make it again soon and revamp this post. Until then if you have any questions ... please ask! I promise you really can't mess it up! Just add whatever sounds yummy.

Hot Poppers

Friends, I have the yummiest and simplest recipe to share with you today. AND it's a great appetizer or snack for any occasion. This recipe is courtesy of Lindsay at Hello, Hue.


To make these you must acquire:

*1 can of Pillsbury crescent dough
*About 2-4 tablespoons of cream cheese {may need more or less depending on your taste}
*1-2 fresh jalapenos
*about 2-3 strips of bacon
*1-2 cloves of garlic {this is an addition I made to the original recipe}

Makes around 12-16 poppers.


Directions:

[one] Pre-heat the oven to 350 degrees F.

[two] Chop jalapeno into small pieces and be sure to remove the seeds. {You may want to use gloves during this part as even after washing hands you'll still feel the burn of the jalapeno in your skin}

[three] Mince garlic into tiny pieces.

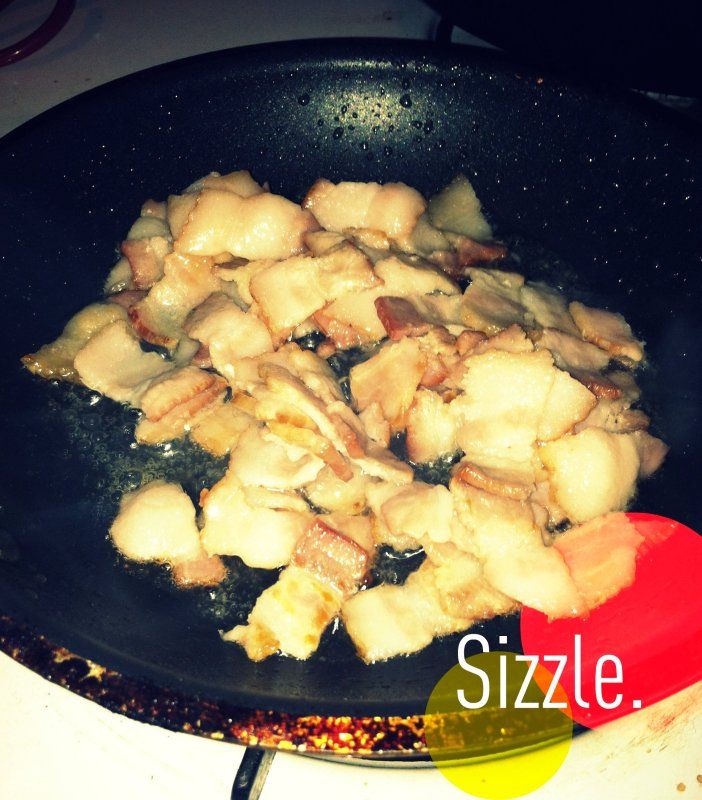
[four] Cut bacon into pieces and fry it up. It's easier this way so that you get the best little pieces for your poppers. Crispy bacon strips are hard to chop! Let bacon rest on a paper towel.


[five] Spray a cookie sheet with non-stick spray and pop open/roll out your dough. It's already pre-cut into triangles so all you need to do, once flat, is to cut each triangle diagonally again so that you have two triangles. Make sense?


[six] Place a dollop of cream cheese, jalapeno, garlic and bacon onto each triangle of dough.


[seven] Bring the corners of each triangle together and seal with your fingers so that the insides aren't going to come out. {This can be difficult and likely won't look too pretty but I promise it will taste amazing and no one will care!}


 [eight] Pop into the oven and bake for 10-15 minutes at 350 degrees. Check them and when the edges are a golden brown you can pull them out!

[nine] Let cool for a few minutes {seriously} and then ENJOY!


Delish! Now I need to make some more.

Caramel Apple Cheesecake Bars

After working on it all weekend I think I'm finally somewhat satisfied with my new blog design. I really wanted to take it in a new direction and since I can't afford to pay the talented people who know how to do such things right now.... and I want to learn .... I worked on it all myself.

What do you think? There are lots of little tweaks I'm going to try and make over the following weeks but I like the overall look of things now.

Also I've been wanting to share the recipe with you from this post. It is a-mazing. Seriously. 


::RECIPE::

Crust:
2 cups all-purpose flour
1/2 cup firmly packed brown sugar
1 cup (2 sticks) butter, softened

Cheesecake Filling:
3 (8-ounce) packages cream cheese, softened
3/4 cup sugar, plus 2 tablespoons, divided
3 large eggs
1 1/2 teaspoons vanilla extract
Apples:
3 Granny Smith apples, peeled, cored and finely chopped
1/2 teaspoon ground cinnamon
1/4 teaspoon ground nutmeg
Streusel topping, recipe follows

1/2 cup caramel topping

Preheat oven to 350 degrees F.
In a medium bowl, combine flour and brown sugar. Cut in butter with a pastry blender (or 2 forks) until mixture is crumbly. Press evenly into a 9x13 baking pan lined with heavy-duty aluminum foil. Bake 15 minutes or until lightly browned.
In a large bowl, beat cream cheese with 3/4 cup sugar in an electric mixer at medium speed until smooth. Then add eggs, 1 at a time, and vanilla. Stir to combine. Pour over warm crust.
In a small bowl, stir together chopped apples, remaining 2 tablespoons sugar, cinnamon, and nutmeg. Spoon evenly over cream cheese mixture. Sprinkle evenly with Streusel topping. Bake 40-45 minutes, or until filling is set. Let cool in refrigerator for at least a day for optimal cheesecake firmness (can also be frozen) or just let cool. Drizzle with caramel topping and enjoy!

Streusel Topping:
1 cup firmly packed brown sugar
1 cup all-purpose flour
1/2 cup quick cooking oats
1/2 cup (1 stick) butter, softened
In a small bowl, combine all ingredients. I like to really combine it by using my clean hands to thoroughly combine the butter into the mixture.


Source: adapted from Paula Deen

{Thrifted Thursdays} Week 2

For the full run down on what's going on around here these Thursdays you can read this.

This week I wanted to share something in my house that isn't just awesome but also useful. And while it's not exactly thrifted; sometimes hand-me-downs {that are rad} should count just as much.

My thrifted item for today is my MIXER. Given to me by my step-momma, given to her by her momma.... and I'm in love with it. Not only does it have so much history {of making yummy things} but it's also got that cool vintage vibe that I la-la-love.

So of course if I'm going to share the mixer with you; I also need to make something. Today's {Thrifted Thursday} is like a two-for-one deal. Whoot.

Here's to the Brown Sugar Banana Nut Bread. {or muffins if you're like me}


STEP ONE:: Enjoy the beauty of the mixer. You can also make these in a normal bowl. ;)


STEP TWO:: Gather ingredients.
-eggs
-walnuts
-baking powder
-brown sugar
-butter
-salt
-flour
-ripe bananas
-sour cream
-cinnamon
-vanilla


STEP THREE:: Mix together following recipe {see below}


STEP FOUR:: Place in tin of your choosing {I wanted muffins} and place into the oven to bake.


STEP FIVE::Enjoy the yummy!


THE RECIPE::
{adapted from All Recipes}


INGREDIENTS::

  • 1/2 cup butter, softened
  • 1 cup brown sugar
  • 2 eggs
  • 1 tablespoon vanilla extract
  • 2 very ripe bananas, mashed
  • 2 cups all-purpose flour
  • 3 teaspoons baking powder
  • 1/2 teaspoon salt
  • 1/2 cup chopped walnuts
  • 1 tsp cinnamon
  • 1/3 cup sour cream

DIRECTIONS::

  1. Preheat oven to 350 degrees F (175 degrees C). Lightly grease a 9x5 inch loaf pan.Or muffin tin can also be used if making muffins. 
  2. In a large bowl, cream together the butter, sour cream and sugar until light and fluffy. Stir in the eggs one at a time, beating well with each addition. Stir in vanilla and banana. In a separate bowl, sift together flour, baking powder, cinnamon and salt.
  3. Blend the banana mixture into the flour mixture; stir just to combine. Fold in walnuts. Pour batter into prepared pan. Sprinkle top of either bread or muffins with extra brown sugar.
  4. Bake in preheated oven for 45 mins to 1 hour, until a toothpick inserted into center of loaf or muffin comes out clean. 


Latte Krispy Treats

Ya'll....I came up with something on the fly the other day that I JUST HAVE TO share with you. So I love Rice Krispy Treats and they're something my momma always made for us. I am pretty darn great at making them (if I do say so myself) and this time was no joke.

What did I do? I just made the grown up version of the yummiest, easiest treat to make on the planet. And now I'm going to share it with you. Because I'm cool like that. And I think you're cool like that too. AND because I just KNOW you'll get addicted to these just like I did.


the steps.


and then.


The-not-too-much-of-a-recipe:

{ONE} Melt the butter and add couple spoonfuls of ground coffee beans
{TWO} When butter is fully melted add marshmellows (full bag) and a splash of your favorite creamer. Melt till liquid, stirring constantly. Remove from heat.  
{THREE} Quickly add your desired amount of rice krispies and stir. I use about 3/4 of the box. 
{FOUR} Spoon out into either greased pan or wax paper. 
{FIVE} Let cool and harden a bit and then ENJOY!

{A Day in the Life}

A BAKER

I have mentioned that I am not one much for cooking. But I LOVE to bake. Or at least try. This entire weekend I have been ridiculously sick. But I really want to share with you an amazing recipe I saw on Elizabeth Ann's Recipe Box. It's for my most favorite dessert EVER.


The best part about this recipe is that it was super easy and DELICIOUS. I think I may make it next weekend for Dad's day.


{1} Ingredients || {2} Squeezed lime juice || {3} All mixed up || {4} YUM

Key Lime Pie
Graham crackers
6 TBS. butter
1/3 cup white sugar
1/2 cup sour cream
3/4 cup key lime juice (about a bag of 20 limes)
1 TBS. grated lime zest
3 cups (2 14oz. cans) sweetened condensed milk
Preheat oven to 350 degrees. Use 9 inch prepared graham cracker crust (like me), or, to make crust: mix graham cracker crumbs, butter and sugar in large zip lock bag. Blend well and press into pie plate. Bake for 7 minutes. Let cool.
While cooling, in medium bowl, combine 3/4 cup key limes juice with 3 cups condensed milk and 1/2 cup sour cream and 1 TBS lime zest. Mix well and pour into baked graham cracker crust. Bake in preheated oven for 5-8 minutes, until tiny pinhole bubbles burst on the surface of pie. DO NOT BROWN! Chill pie thoroughly before serving. Garnish with lime slices (or I chose strawberries) and whipped cream if desired.
Thanks Elizabeth!


Summer Pasta and Extreme Brownies

One of my favorite parts of the bloggy world is reading all the talented recipes of those much more culinary-inclined than myself. Don't get me wrong---I like eating A LOT and I will even cook a meal without TOO much complaining. Especially if it involves a good shuffle on the Ipod and my cute fella.
Well last night I ran across a recipe from this lady over at The Elephant's Trunk and I KNEW I needed to try it once the words Balsamic Vinegar and Pasta were involved. Those are pretty much my two favorite ingredients and being honest I am a happy girl if I make some Capellini pasta (similar to angel hair) and toss it with some balsamic and garlic and EAT. Dinner done. I'm simple.
But last night we took it too the next step and followed this recipe and after seeing the pictures I think you will want to also. Plus it's SUPER easy. Promise.


And you also might notice the AMAZING brownie I made with a Oreo on the bottom. NOT at all my idea. You can find the story about it from a newer bloggy friend of mine, April at Gingerbread girl. When I saw her write up on this fabulous idea she had; I just KNEW I was going to do it. SO EASY and YUMMY! No lie, I got home quite late last night (after spending great quality time with friends) and made these babies at 2am. Hehe. They made for an incredible breakfast. ;)

Hope you all are having a fabulous weekend. I'm certainly glad for a bit of warm weather.

Coconut Cupcakes w/ Cream Cheese Frosting

Yesterday was my day off so I decided to try my hand at making some delicious cupcakes.


Let me walk you through the steps (in case you'd like to make them too)!

First you need to mix all the wet ingredients.


After the wet deliciousness of course, comes the dry. Along with buttermilk.


And after everything is combined, add the 7 ounces of coconut. And of course, BAKE.


Now it's time to make some frosting. Cream cheese is the best.


 Once your frosting is done you can decorate your cupcakes. Add the extra coconut touch to the top.


Aren't they amazing? So stinking yummy too. Wait till you try one. Thank you Barefoot Contessa.

Oh, and you probably want the recipe right?
Of course you do.

Here it is {enjoy}:


COCONUT CUPCAKES
MAKES 18-20 Large Cupcakes

¾ POUND  Unsalted butter at room temperature (2 ¾ cups)
2 CUPS sugar (1cup white, 1 cup brown)
5 extra-large eggs at room temperature
1 ½ TEASPOONS pure vanilla extract
1 ½ TEASPOONS pure almond extract
3 CUPS all-purpose flour
1 TEASPOON baking powder
½ TEASPOON baking soda
½ TEASPOON salt
1 CUP buttermilk
14 OUNCES sweetened, shredded coconut
Cream cheese icing (recipe follows)

Preheat the oven to 325 degrees.
                In the bowl of an electric mixer fitted with a paddle attachment, cream the butter and sugar until light and fluffy, about 5 minutes. With the mixer running on low, add the eggs one at a time, scraping down the bowl after each addition. Add the vanilla and almond extracts and mix well.
                In a separate bowl, sift together the flour, baking powder, baking soda, and salt. In three parts, alternately add the dry ingredients and the buttermilk to the batter, beginning and ending with the dry. Mix until just combined. Fold in 7 ounces of coconut.
                Line a muffin pan with paper liners. Fill each cup to the top with batter. Bake for 25 to 35 minutes, until the tops are brown and a toothpick comes out clean. Allow to cool in the pan for 15 minutes. Remove to a baking rack and cool completely. Frost with cream cheese icing and sprinkle with remaining coconut.

CREAM CHEESE ICING
For 18-20 Large Cupcakes

1 POUND cream cheese at room temperature
¾ POUND unsalted butter at room temperature
1 TEASPOON pure vanilla extract
½ TEASPOON pure almond extract
1 ½ POUNDS confectioners’ sugar, sifted

In the bowl of an electric mixer fitted with a paddle attachment, blend together the cream cheese, butter and vanilla and almond extracts. Add the confectioners’ sugar and mix until smooth. 


Spring has arrived

Tonight we made some beautiful food.
And I would like to share it with you.

FIRST DRINKS:

No editing tricks from Picnik, just wanted to give it to you straight. 


Crushed ice. Citrus Vodka. Splash of Newman's Lemonade. Splash of TJ's Orange-Strawberry-Banana. Squeezed Lime Wedge. Orange Zest.


FRESH SALAD:


Yellow Pepper & Orange Pepper (both grilled). Mango. Green Grape. Sweet Tomatoes. Champagne Vinegar. Fresh Squeezed lime juice. Sprinkle of your favorite seasoning.


THE MEAT:


We bought the pre-marinated Hawaiian thin cut meat from our local Trader Joe's and grilled it up! 

MEAT [AFTER]:


So ridiculous delicious and easy. Three minutes per side. Mmmm. 


DINNER TIME:


All the pieces combined. We also had perogi's but they didn't turn out too great. Note to all---frozen perogis are a no-go. Boo. It was great. And because I didn't enjoy my perogi; I just went back for more meat and salad. Delish! 

All of the bright food and the BBQ fired up really makes it official that it's spring. Even here in Oregon. Oh, and I guess that bright shiny thing in the sky helps too. But we really aren't used to it. And we try not to GET used to it. ;) 

Here's one more sign that it's Spring.

I am thinking this may make a gorgeous next tattoo. 

Hope your Tuesday was bee-u-ti-ful! 
xxx, ooo


»

Categories

[heart] (10) {A Day in the Life} (4) {Thrifted Thursdays} (13) 2013 (2) 4sponsor (3) adoption (1) all things culinary (1) anniversary (1) apps (2) Aspirations (12) awkward and awesome. (2) baking (1) Be Sensational (1) birthdays (10) Blog design (2) blogiversary (1) blowfish (6) Books (2) boyfriend (34) bucket list (1) Button (1) cards (1) care (6) causes (2) change (1) change4change (1) christmas (1) CHWH (1) coaching (1) coffee (3) conference (1) cooking (1) crafty (5) Currently. (9) design.decorate (3) DIY (3) dog (1) drinks (1) etsy (29) eyeglam (2) fall (4) family (2) Fashion (12) Favorite lovelies (23) features (2) first one (1) food (2) fridayis (1) friends (11) gifts (1) giveaways (26) glasses (3) GroopDealz (2) growing (1) guest post (1) hair (1) hair pretties (6) happiness (4) headbands (2) health & fitness (2) holidays (5) home (1) hoop art (3) inspiring (5) Instagram (3) iPhone (4) Italy (2) itsok (1) jewelry (1) lifestyle (1) linky (9) little things (5) living (1) los angeles (1) love (9) maintainence (1) mani-monday (1) meetmark (1) modcloth (2) Molly (1) Momma (2) mommas (3) motivation (1) movies (1) moving (5) music (1) musings (4) Nanny (1) new house (1) ombre (1) our story (2) outdoors (2) pickling (1) pinterest (1) pintrest (5) polyvore (1) reality (2) recipes (17) relaxation (2) sad day (1) sale (4) sales (1) SAVETHEBOOBIES (2) seriously amazing + seriously whaaat (1) shakes (1) shop my closet (2) shopkempt (1) Shopping (7) sick day (2) SNAP (1) southern california (1) special events (3) sponsored (1) Sponsors (11) stories (1) sunshine (3) sweet treats (1) switzerland (1) taking stock (2) tattoo (1) thankful (5) the good stuff (25) the tweet (1) thoughts (4) travel (2) trips (1) tutorial (1) vacation (1) vintage (2) winner (12) WIWW (10) xoxo (44) Yummy (21)
Beautiful Blendings 2011. Please ask before taking any pictures or words. Thanks. Xo. Tara. Powered by Blogger.

BEAUTIFUL BLENDINGS All rights reserved © Blog Milk Powered by Blogger